Most API resources are protected, and therefore require that you authenticate using your tokens.
To start with the REST API, you first need to generate a token keypair, that allows you to authenticate against the API for all further requests. This token is permanent, and is to be re-used for each request you make to the REST API.
Generate Your Token Keypair
Authentication keys can be generated as explained below:
- Go to the Crisp Marketplace;
- Sign in or create an account (this account is different from your main Crisp account);
- Once logged-in, go to Plugins and click on the New Plugin button;
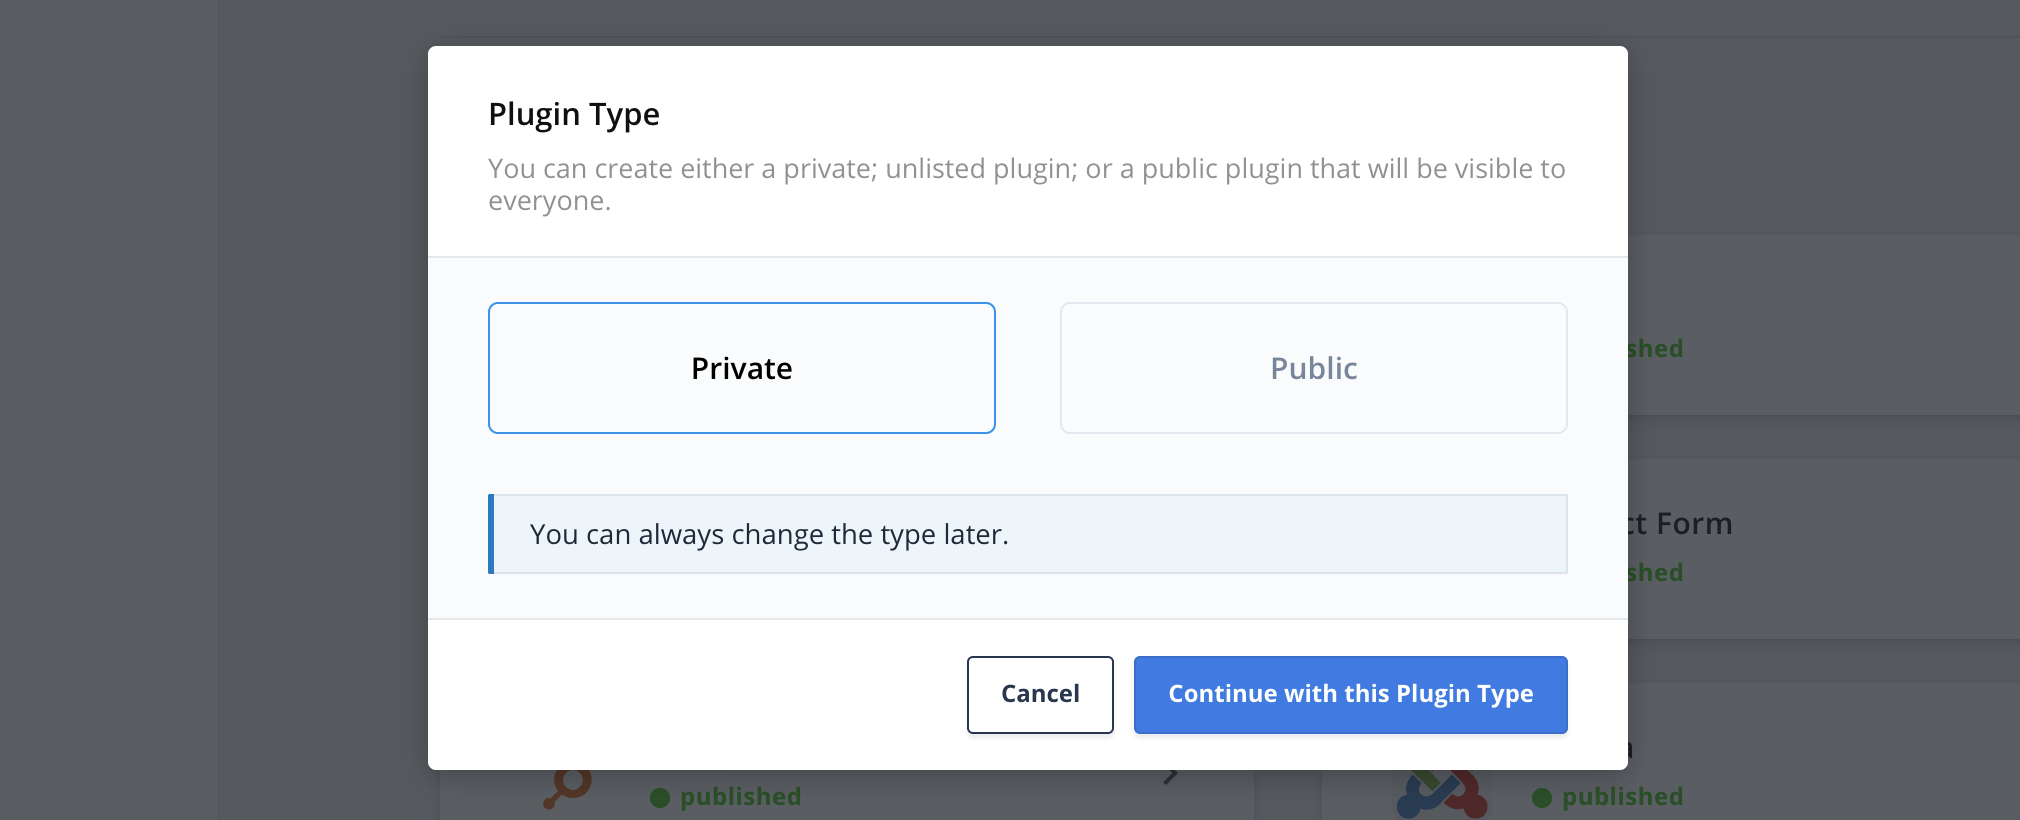
- Select the plugin type, in this case Private;
- Give your plugin a name, eg. "Integration", and hit Create;
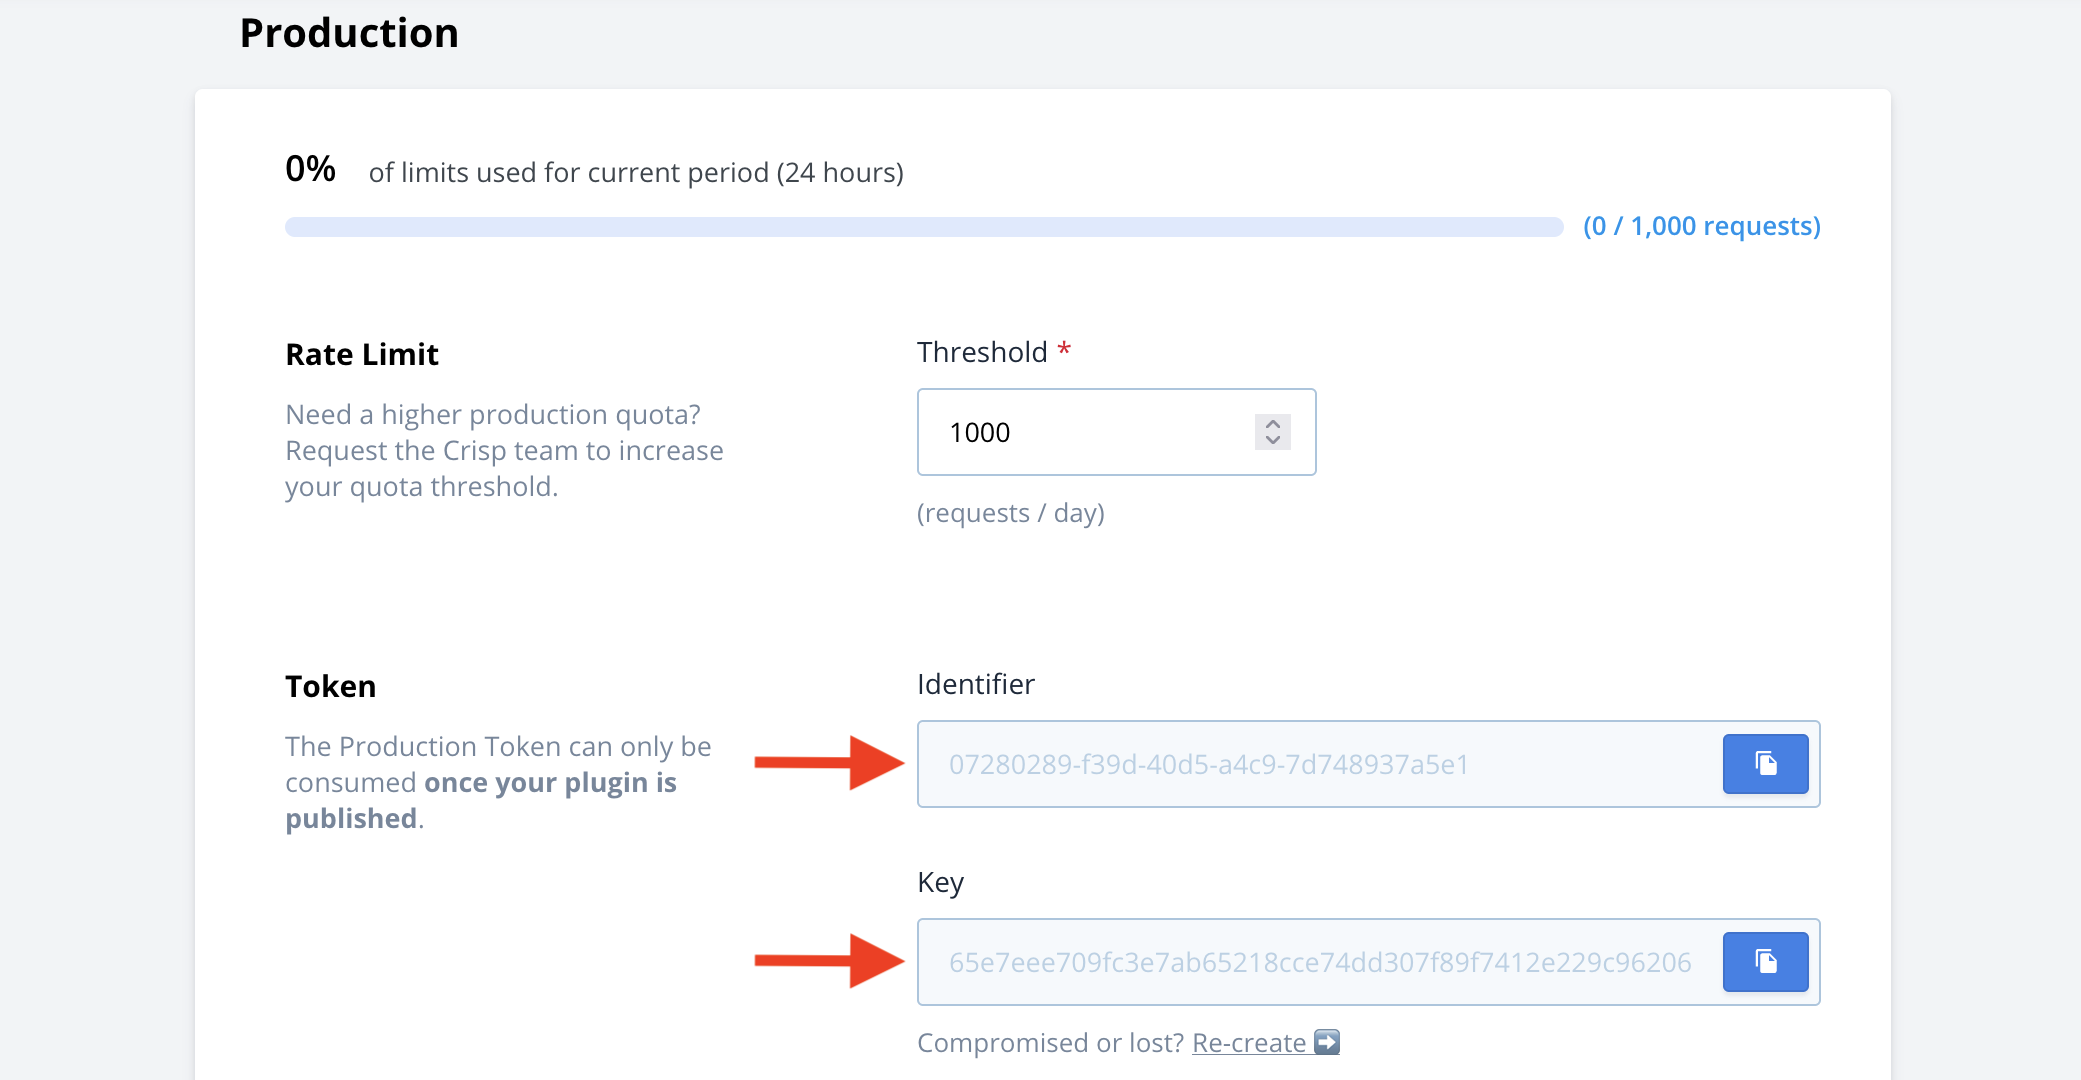
- On the plugin page, go to Tokens and scroll down to Production;
- Click on "Ask a production token", and pick the scopes you require;
- Click on "Request production token";
- (wait that your submission gets approved, this can take a few minutes);
- Once accepted, come back to Tokens, and copy your Production token keypair (configure it securely in your integration code);
- Finally, install the plugin on all websites you need to use it for (using the private install link, provided in the Settings section under Danger Zone / Visibility);
Your token is provided to you as a keypair containing two secret values: identifier and key, which you need to keep private at any time.


Use Your Token Keypair
Once you have your private authentication keys, you can use them to authenticate your HTTP requests to the API.
Authentication headers
You can authenticate by adding an Authorization header to all your HTTP calls. The Authorization header is formatted as such: Authorization: Basic BASE64(identifier:key) (replace BASE64(identifier:key) with your Base64 string).
Also, include the X-Crisp-Tier header in your HTTP requests, with the value plugin. This lets the REST API know that the token you are using is a plugin token, and not a regular user token.
Put together, this gives the following headers that must be set on the request:
Authorization: Basic BASE64(identifier:key)
X-Crisp-Tier: pluginidentifier:key string to the ASCII Plain Text input and get your encoded string in the Base64 input.Authentication examples
Command-line (cURL)
curl https://api.crisp.chat/v1/website/{website_id} \
  --get \
  --user "{identifier}:{key}" \
  --header "X-Crisp-Tier: plugin"
Replace {identifier}:{key} with your token keypair (keep the middle : separator). Also, replace {website_id} with your target website identifier.
If your token keypair and website identifier are valid, then you should see the website details in the response.
Questions & Notes
Why do private tokens need to be generated that way?
Instead of providing Crisp websites with a one click pre-generated API token, we decided to require private tokens to be generated the same way as public tokens, for the following reasons:
- Tokens can be rolled easily in case they leak;
- Higher rate-limits (ie. quotas) can be requested anytime;
- Different tokens can be generated per-usage, each limited with scopes (this is a nice security property);
- You can access multiple websites with a single token;
- Easily monitor your token usage from the Marketplace;
What are token scopes?
For more details on token scopes, please read the in-depth guide on Token Scopes.
Whenever you request your Production token, you need to pick a list of scopes that your plugin requires. For each scope, you can select read or write permissions, or both. You then need to provide a message to explain why you need each selected scope.
What are token daily quotas?
Tokens created under the plugin tier are not subject to regular REST API per-minute rate-limiting rules. This allows integrations to send much more requests than traditional user tokens would allow, also allowing request bursts.
As any token must still be limited in usage over some period of time, plugin tokens are limited with a daily request quota. This daily quota can be higher or lower for each integration: you can request an increase anytime.
Security considerations
Your token keypair must be kept private in any situation. This token lets you access the data of websites that installed your plugin.
If you suspect any leak of your token, eg. you commited it on GitHub by mistake, then roll it immediately. Your Marketplace dashboard lets you roll tokens in a few clicks, in which case the previous token will be immediately revoked and made invalid.