If you are running the Crisp Chatbox on a Web Dashboard where your users are authenticated to their accounts, you may want to see whether the email of the user chatting with you is verified or not. User verification lets you do that! This adds a bit of security to your support workflow.
How-To Video
How does User Verification work?
User Verification lets you verify the authenticity of the emails of people chatting with your support. This is useful, say, if you run a service where you may have to access and alter user accounts, upon user request. In this case, a common security practice is verify the user identity. User Verification lets you see if a user email is authenticated by your own account system, right from your Crisp Dashboard.
Let's take a simple example: John bought an iPhone from your e-commerce website. He realized he entered an incorrect shipping address, and wants it changed before the iPhone gets shipped.
You will receive support requests from "John" requesting for a shipping address update. But is "John" the one who bought the iPhone, or is he a spoofer who's impersonating John in order to redirect the iPhone to his shipping address? (as to steal John's iPhone)
Case 1: The real John contacts you
- John logs in to his account on your e-commerce website, using the email address
john@doe.name. - Upon login, your backend signs John's email with a private key that both Crisp and your backend know, and returns the signature to John's browser.
- John's browser, after login, sets Crisp Chatbox email address to
john@doe.name, with the signature. - John sends a message to your support via Crisp Chatbox, requesting for the change of his shipping address.
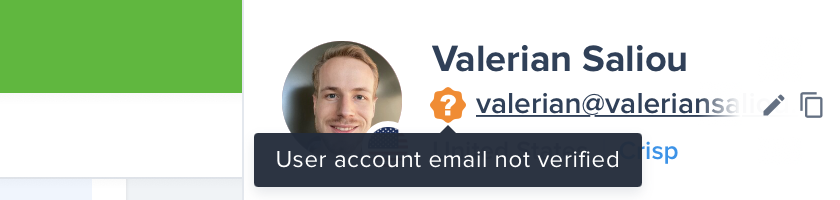
- Your support sees in Crisp Dashboard a green checkmark certifying that John's email address is verified, thus, you know that's the real John speaking on the other side (as long as John's account credentials have not been stolen by someone else).
- You can process John's request as you can prove John's identity was not spoofed (this is the real John speaking).

Case 2: The spoofer contacts you
- The spoofer comes to your e-commerce website, and sets
john@doe.nameas his email via Crisp JavaScript SDK (the email cannot be signed there, as the spoofer doesn't know your private signature key). - The spoofer sends a message to your support, requesting for a shipping address change.
- Bad luck for the spoofer, you can see
john@doe.namewas not verified. You're suspicious, you ask for more personal identification information.
What are the requirements for User Verification?
The verification feature requires you to sign the authenticated user email you provide to Crisp JavaScript SDK, with a secret key. As this secret key must not be know to any public user, you need to keep this on your backend code only.
Thus, it is only possible to generate email signatures from your own backend code. The only requirement for using User Verification is the ability to sign emails from your own backend code, with the secret key Crisp generates for you in your website settings.
How to setup User Verification?
User Verification is straightforward to setup. This step-by-step guide uses NodeJS as a backend platform, but you can easily adapt it to your platform (eg. Python, Ruby).
1. Get your secret key
To sign emails, you need to retrieve your verification secret key:
- Login to your Crisp Dashboard (using a website
owneraccount) - Go to Settings, then Workspace Settings
- Select Advanced configuration
- Scroll to Identity Verification
- Enable "Verify user emails with cryptographic signatures"
- Your secret is being generated (hold on for a few seconds)
- Copy the generated secret key and paste it in your backend configuration (keep it secure!)
2. Generate signatures
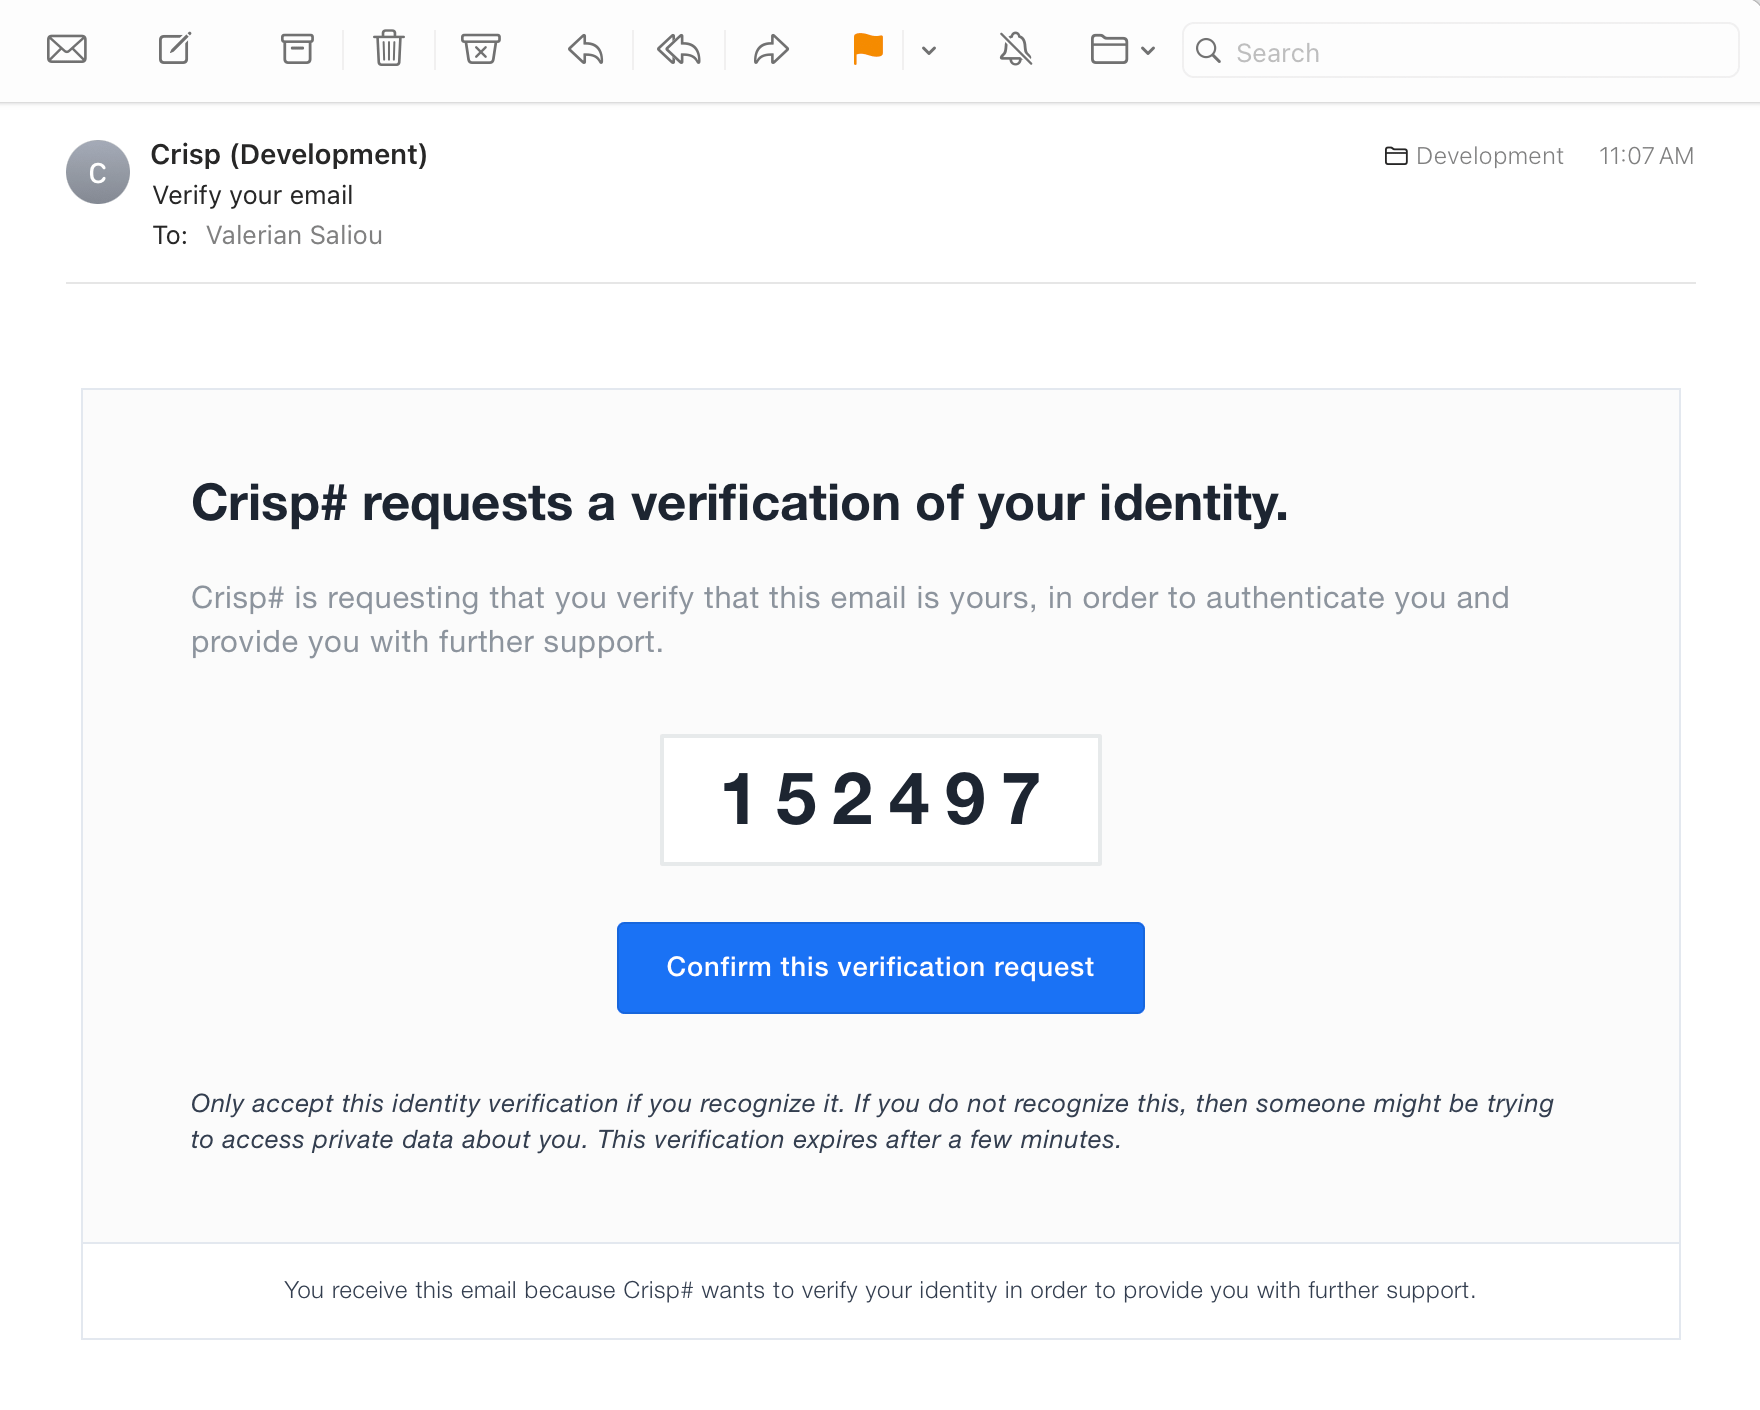
Once you have your secret key, you can now use it to sign emails. Before you start signing email addresses, make sure that when a user authenticates to their account on your platform, the user email is passed from your backend to the frontend, which your frontend JavaScript then use to automatically set logged-in user email in Crisp Chatbox (see this help page).
Now, we need to generate a second parameter (the email signature), that your backend will pass to the frontend (eg. via generated inline JavaScript code). The frontend will then set the email with that signature, using the $crisp JavaScript SDK.
Here's how to generate the signature from your backend code (NodeJS):
const crypto = require("crypto");

// Put you secret key here (keep it private!)
// NOTICE: THE ONE BELOW IS AN EXAMPLE, YOURS WILL BE DIFFERENT!
const secretKey = "0fd72e0ff53b274293029fd1f3f40c92";

// This method signs an email, using your global 'secretKey'
function signEmail(email) {
  return crypto.createHmac("sha256", secretKey).update(email).digest("hex");
}

// Sign your email
// Notice: the email below is an example, yours will be sourced from the logged-in user
var signature = signEmail("user@gmail.com");

console.log("signature is:", signature);HMAC-SHA256 algorithm. Any other HMAC digest is not accepted and will be refused by Crisp Chatbox when provided.As an example:
- We have secret key:
0fd72e0ff53b274293029fd1f3f40c92 - We want to sign the email:
user@gmail.com - We sign using
HMAC-SHA256 - We get the signature:
cd7cc422ea97c82d844b2373fdcd6259c9ee6e135af65ab6fe6ca85e3f07abb1 - This signature is passed to $crisp SDK
user:emailmethod along with the email
3. Submit the signature in your $crisp email calls
Here's how to set the user email with the signature, from your frontend code:
$crisp.push(["set", "user:email", ["email_here", "signature_here"]]);As an example (from above):
$crisp.push(["set", "user:email", ["user@gmail.com", "cd7cc422ea97c82d844b2373fdcd6259c9ee6e135af65ab6fe6ca85e3f07abb1"]]);$crisp.push() call.What makes User Verification secure?
User Verification makes use of the HMAC-SHA256 signature algorithm. As of 2025, HMAC-SHA256 is still recognized as secure by the industry, and is widely used to authenticate data across the Internet.
When setting a user email via the Crisp Chatbox JavaScript SDK, you also set the signature parameter with the signature computed on your backend. This signature is computed using a secret key, that only your backend and Crisp know. Thus, only Crisp and your backend are able to generate valid signatures for a given email. An attacker without the secret key will not be able to generate valid signatures, and thus will not be able to impersonate users chatting with you (or at least, you will see them as unverified, which will spark your attention).
Does User Verification work across other channels?
User Verification can originate from different verification sources:
- Conversations initiated from Crisp Chatbox, when emails are set using the $crisp JavaScript SDK.
- Emails you receive that are signed with DKIM, passing DMARC alignment (SPF + DKIM).
- A Workflow that asked for manual user identity verification.
- Certain integrations where the email comes from a trusted source, such as the Ticket Center.
Conversations coming from other channels (eg. email, custom integrations, etc). will mostly show as Unverified, as Crisp is uncertain about their verification status.

Troubleshoot common issues
1. My $crisp JavaScript throws an error when I set the email
Make sure you are signing with HMAC-SHA256. The chatbox is strict on this and checks you are using the correct signature hash algorithm.
2. All my conversations show as Unverified
Make sure your signature is properly generated, and that you are using the proper signature algorithm, HMAC-SHA256.
3. I cannot find a solution to my problem
If you cannot find a solution to your problem, chat with our support.