Willing to add a Chat SDK to your iOS mobile app? Get started with Crisp in order to improve your customer support and user engagement today. Made easy thanks to SwiftPM and CocoaPods — Install it in a few steps.
The Crisp Chat SDK allows you to add a chat widget to your iOS mobile app, enabling your customers to engage with your brand and easily communicate with your team. Just discovering Crisp and our SDK? You can learn more about our Chat SDKs right here.
Notice
Swift documentation
Looking for the extensive Swift documentation? It is available here.
Video Tutorial
Overview
The Crisp iOS Chat SDK comes with two distinct libraries:
Crisp
CrispWebRTC
CrispWebRTC is required if you want to make audio or video calls to your users. If you’re sure however that you will not need this functionality you can use the Crisp library instead and save ~10 MB in binary size.
Both libraries are drop-in replacements, meaning that they have the exact same API. The only changes you’ll need to perform when switching libraries is to update your Package.swift or Podfile and change any imports from
import Crispto
import CrispWebRTCor vice versa.
Installation
1. Install the Chat widget SDK to your iOS mobile app
Option 1: Using SwiftPM
To use the Crisp iOS Chat SDK with SPM, add a dependency to your Package.swift file:
let package = Package(
  dependencies: [
    .package(url: "https://github.com/crisp-im/crisp-sdk-ios.git", .upToNextMajor(from: "2.0.0")),
  ],
  targets: [
    .target(
      name: "<target-name>",
      dependencies: [
        .productItem(name: "CrispWebRTC", package: "crisp-sdk-ios")
        // or: .productItem(name: "Crisp", package: "crisp-sdk-ios")
      ]
    )
  ]
)
Option 2: Using CocoaPods
Add Crisp to your CocoaPods Podfile:
use_frameworks!

target :YourTargetName do
  pod 'CrispWebRTC'
  # or pod 'Crisp'
end
Then run: pod install
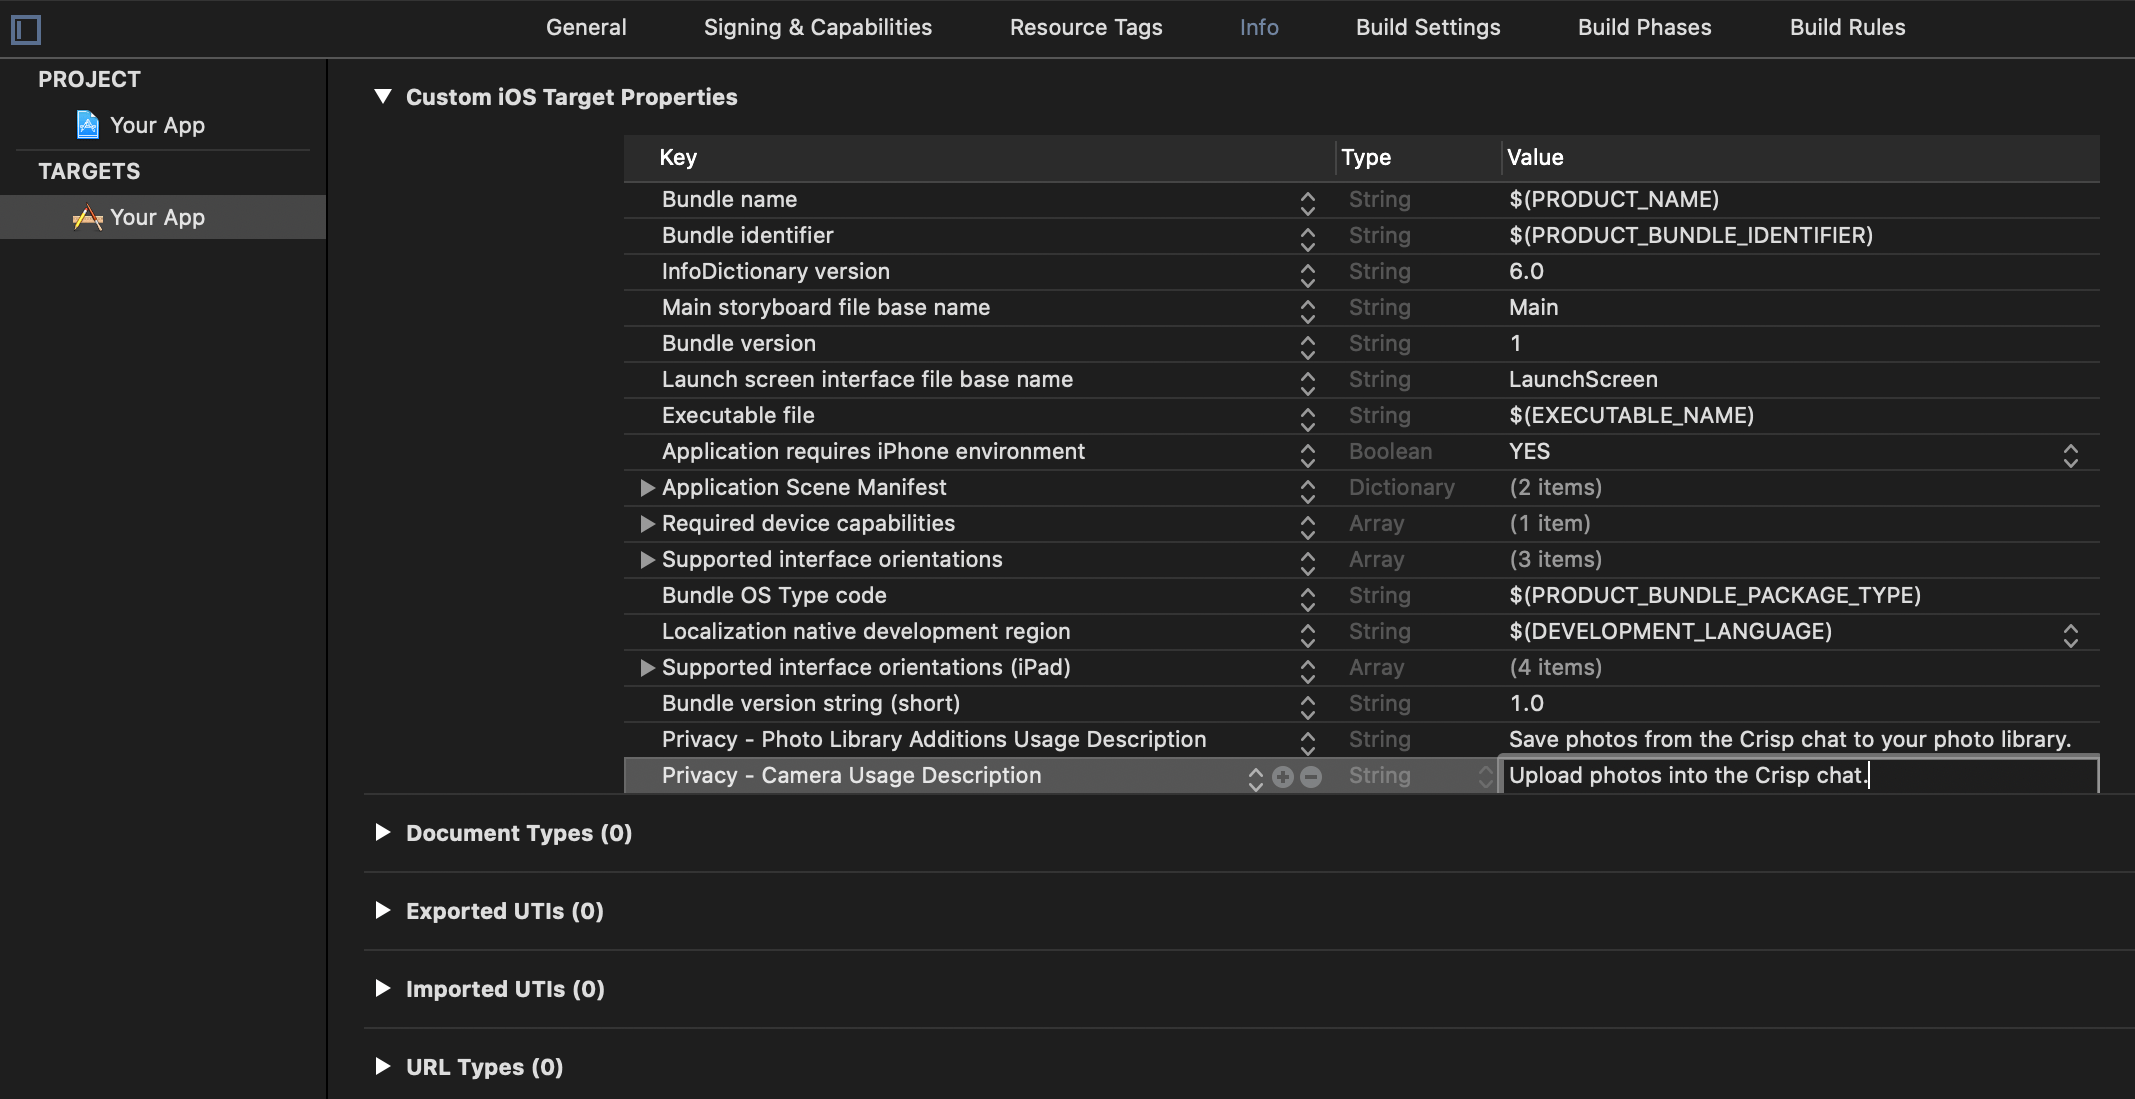
2. Update your Info.plist
To enable your users to take and upload photos to the chat as well as download photos to their photo library, add:
Privacy - Camera Usage Description(NSCameraUsageDescription)Privacy - Photo Library Additions Usage Description(NSPhotoLibraryAddUsageDescription) to your app's Info.plist.Privacy - Microphone Usage Description”(NSMicrophoneUsageDescription) if you’re using the CrispWebRTC library.
3. Configure the Crisp iOS Chat SDK
Go to your Crisp Dashboard, and copy your Website ID:
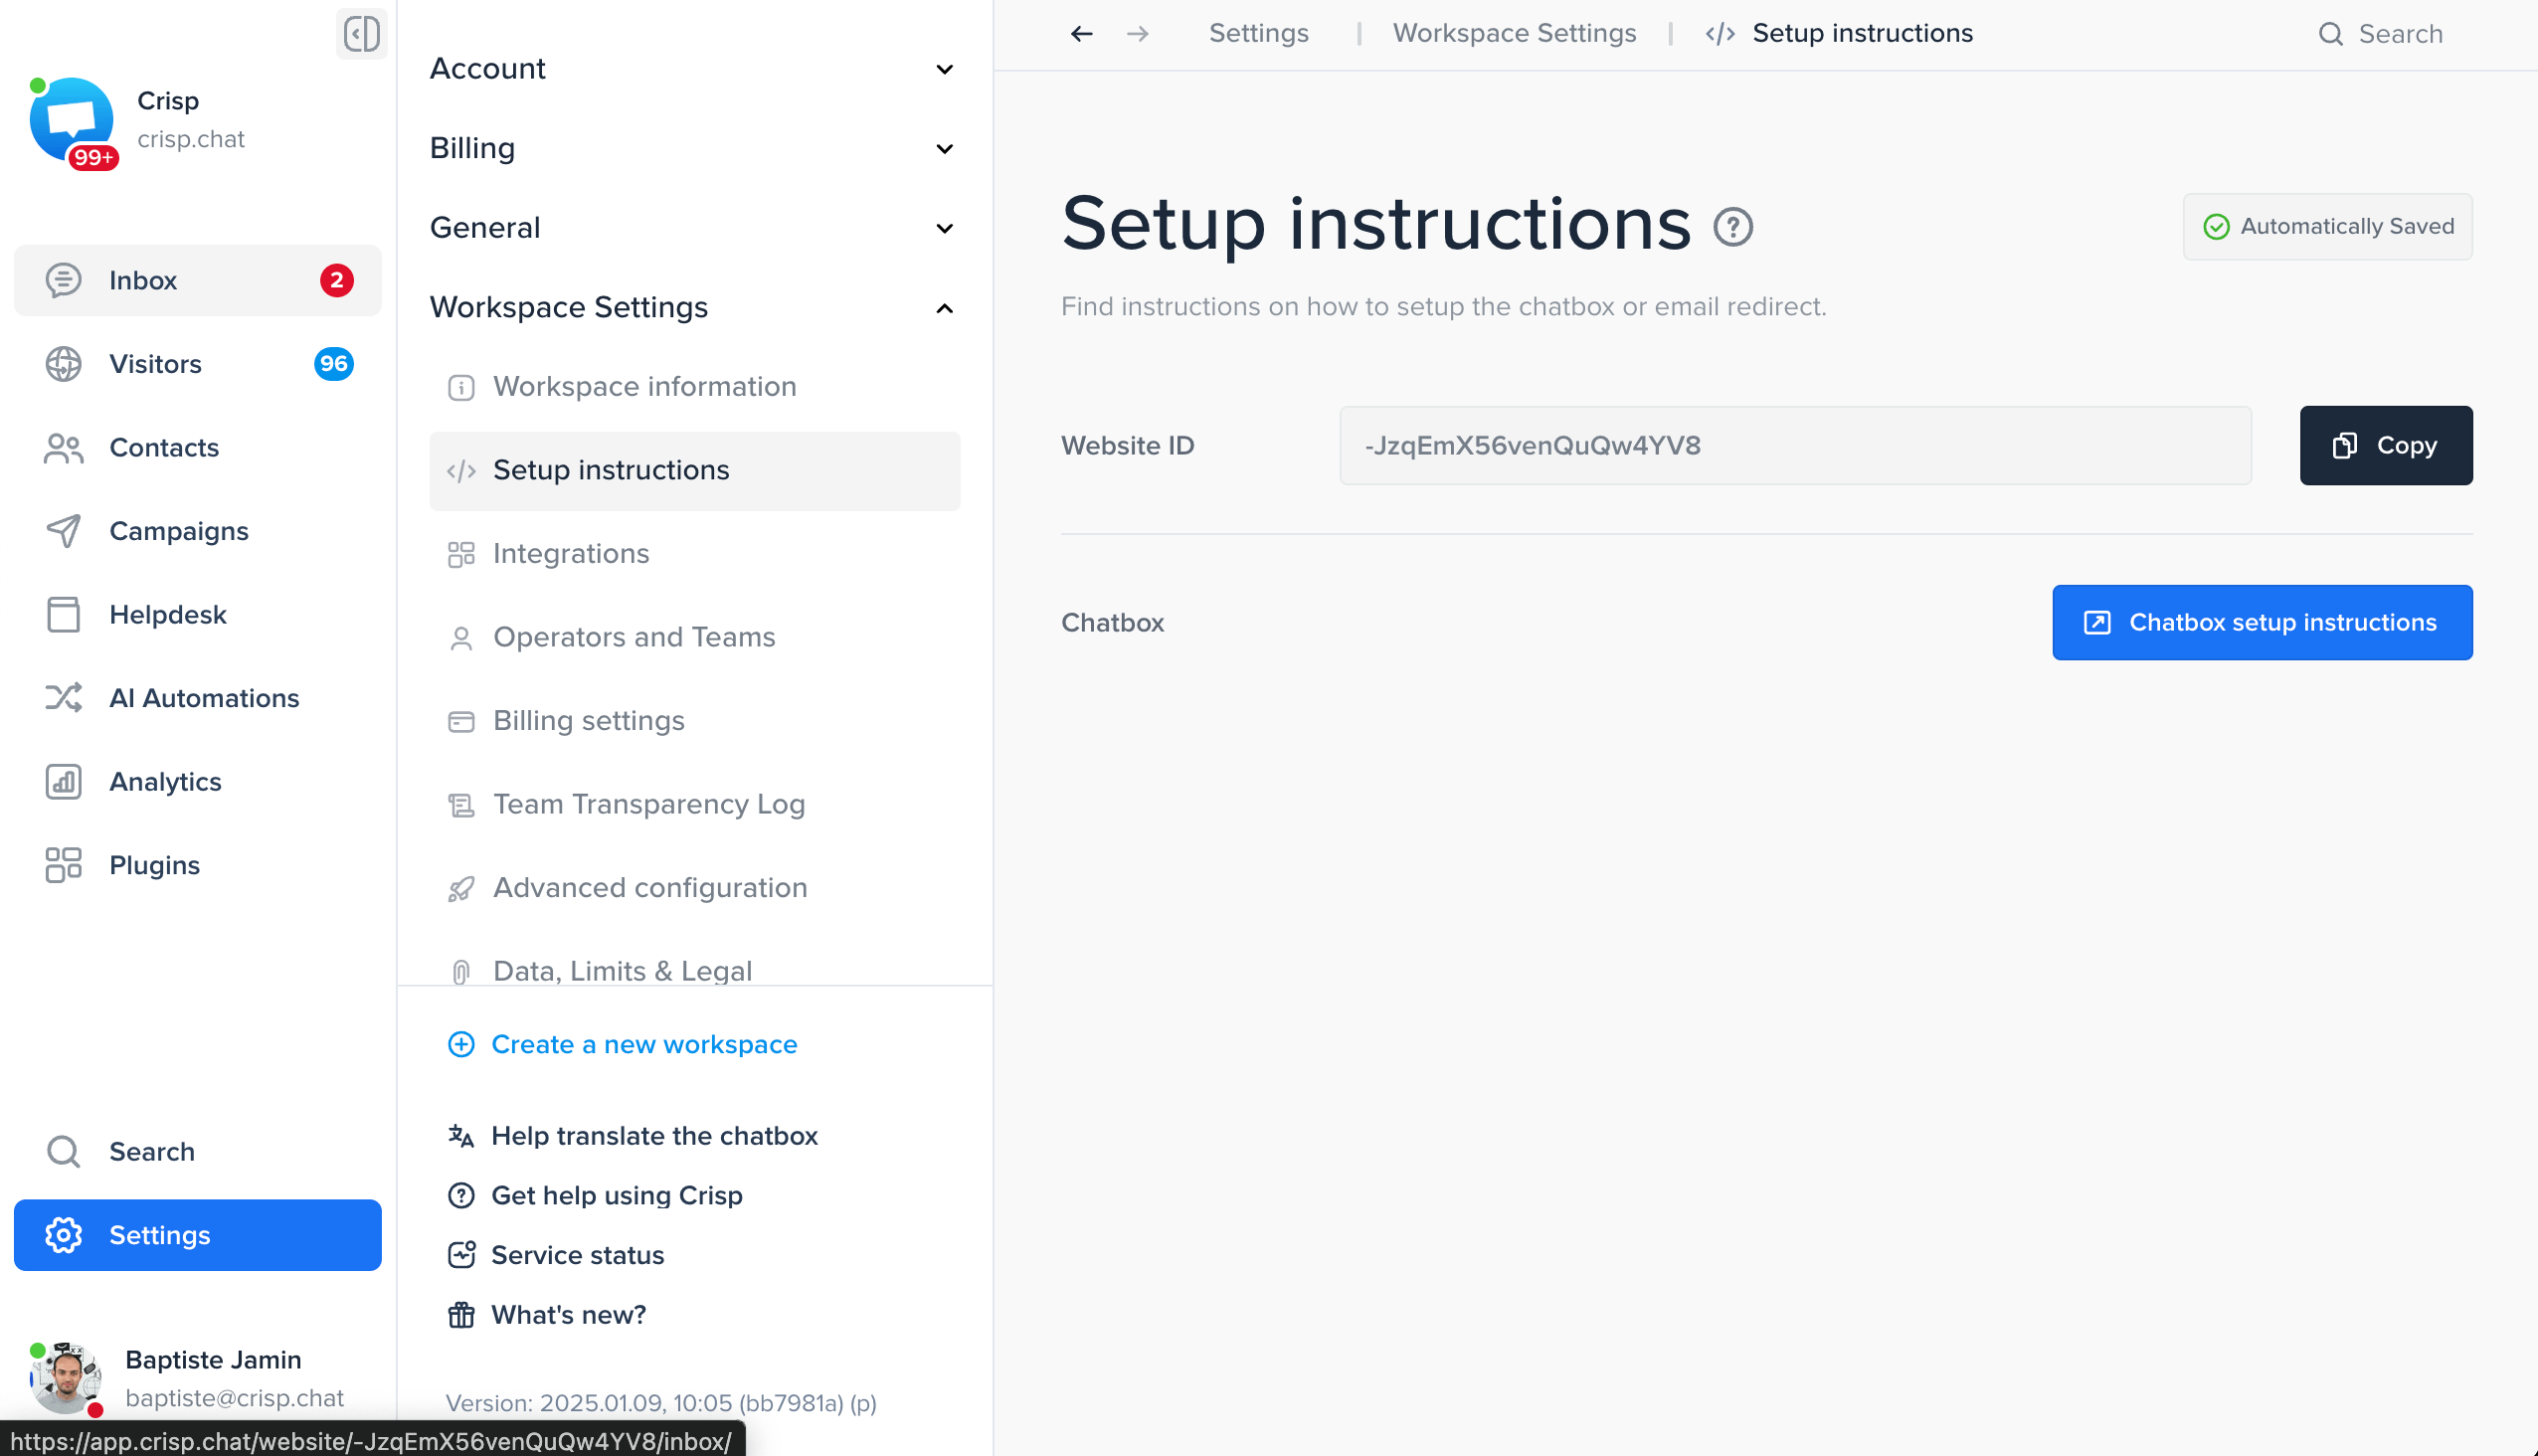
Error starting chat errors. This setting can be found in Settings > Website Settings > Chatbox & Email Settings > Chatbox Security.Then, configure the Website ID in the SDK code:
import CrispWebRTC

// In your func application()
CrispSDK.configure(websiteID: "YOUR_WEBSITE_ID")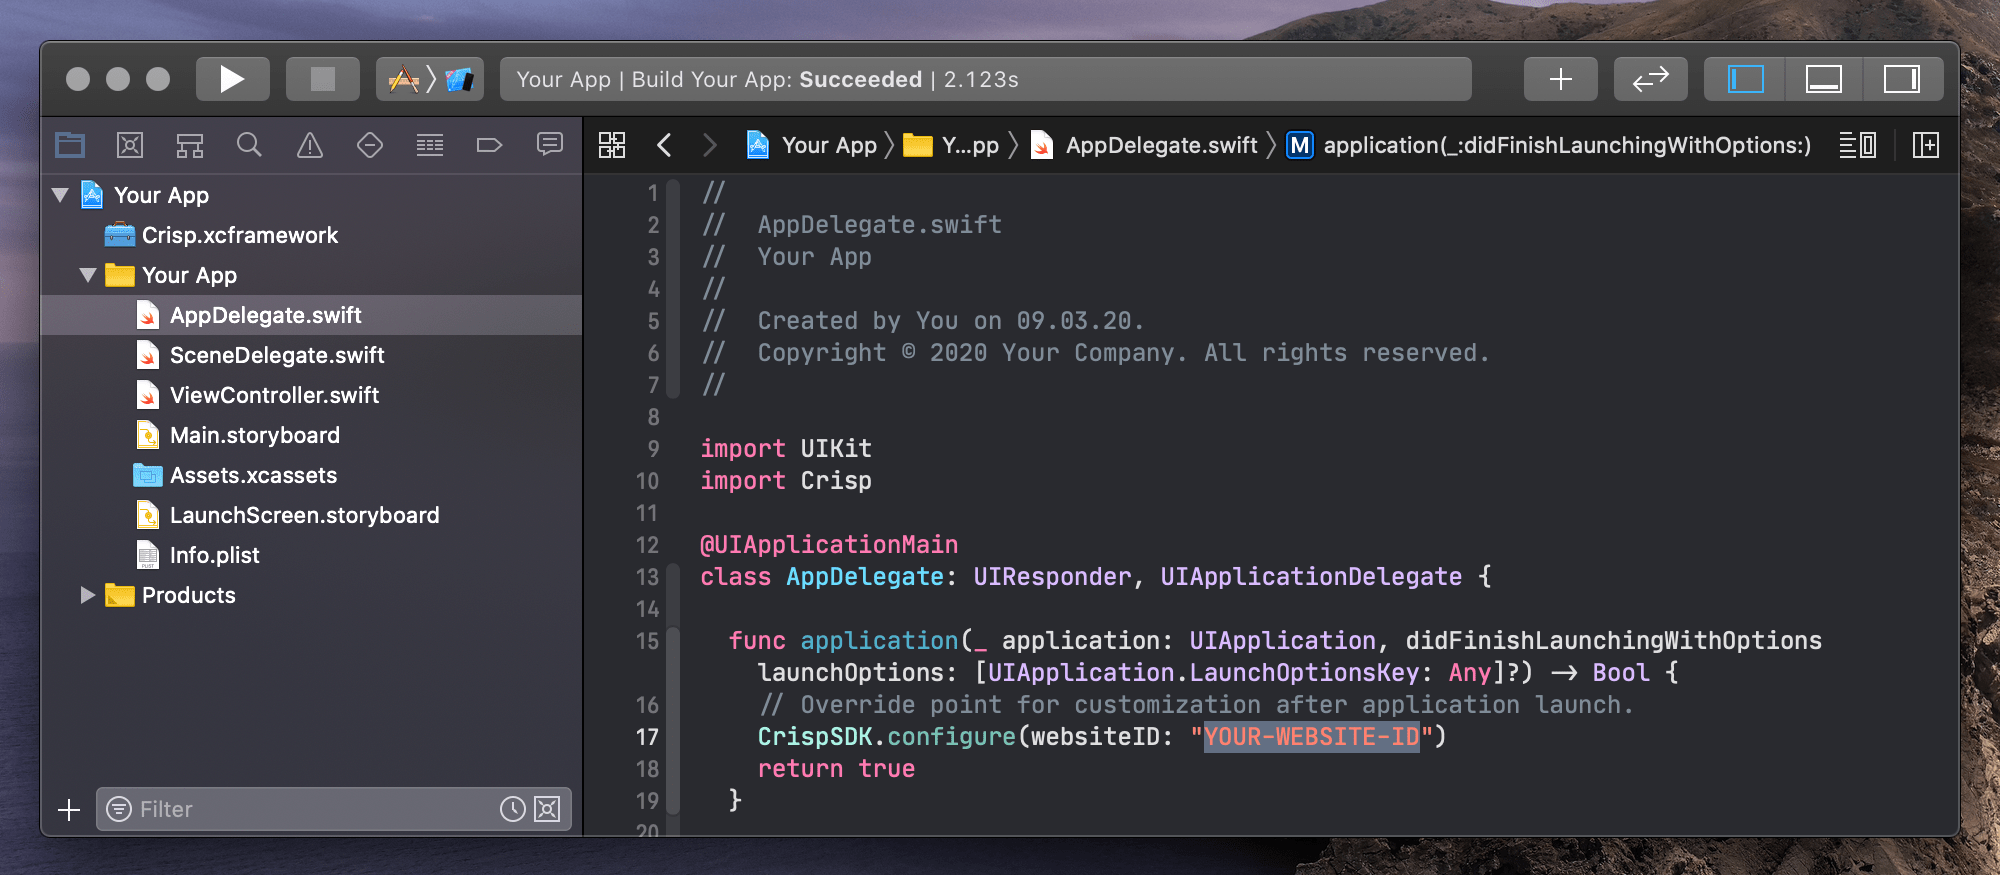
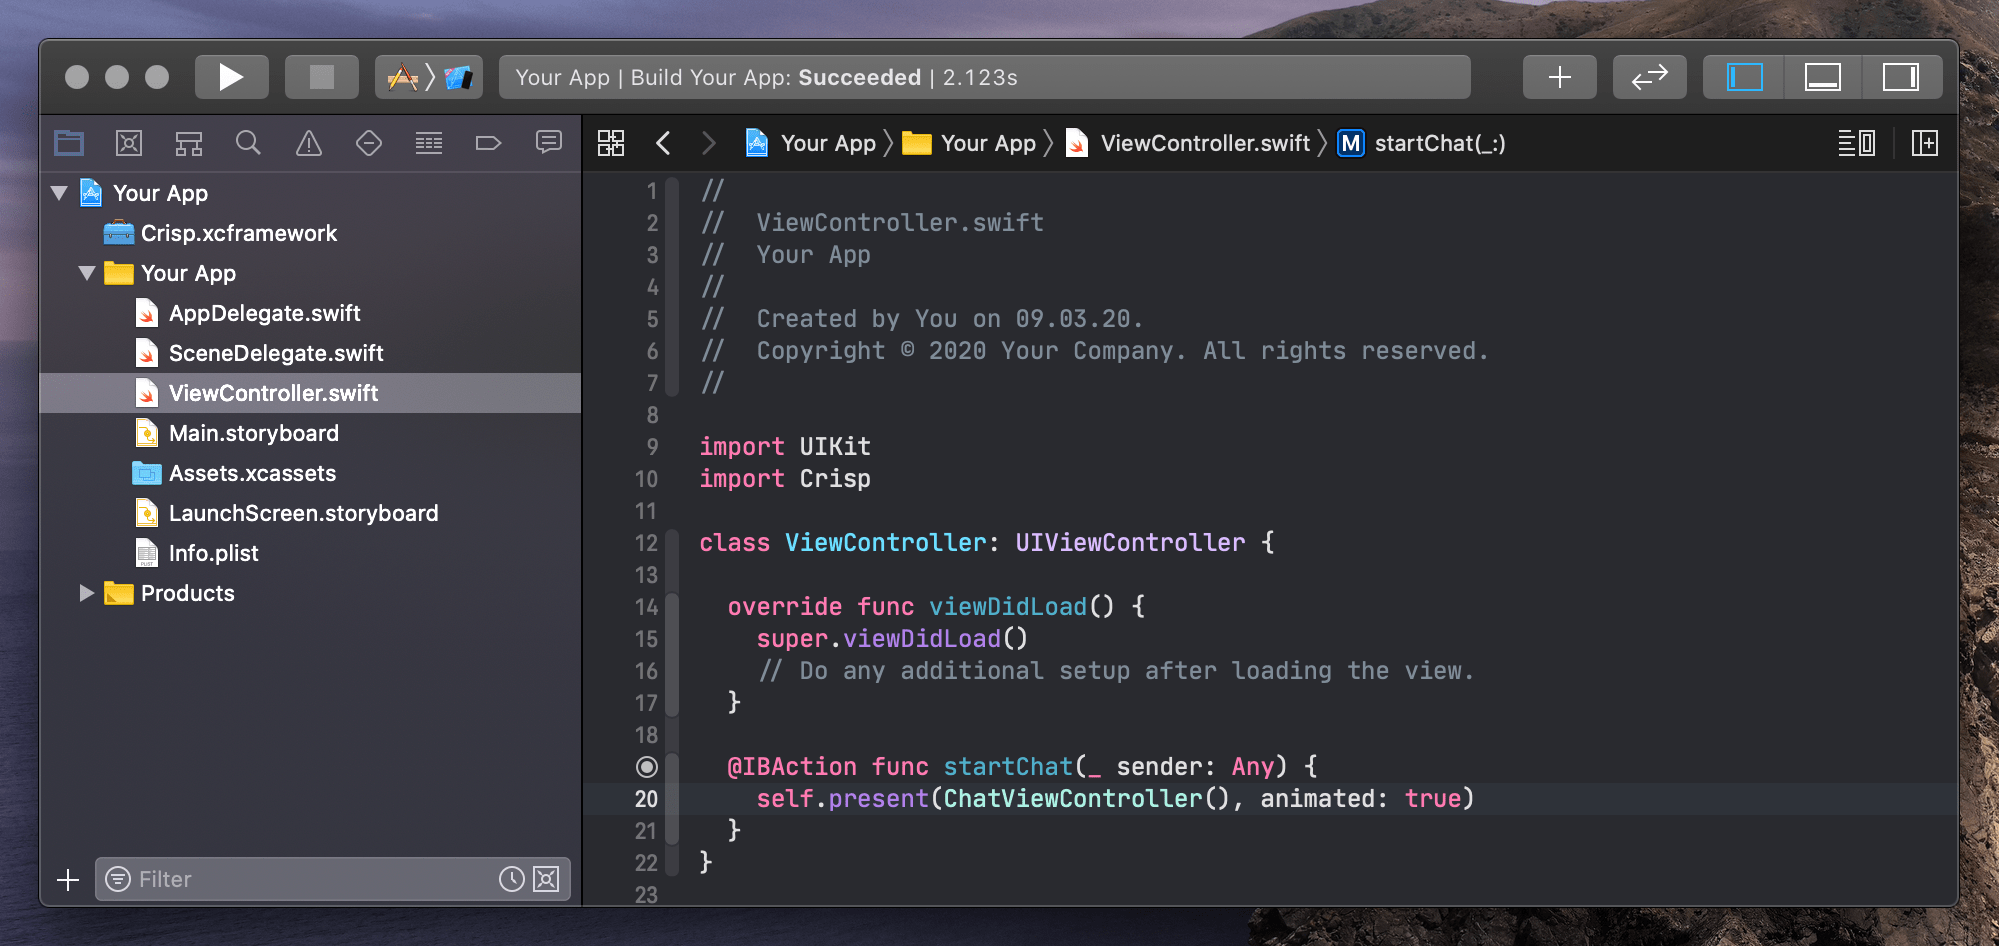
4. Present the ChatViewController
import CrispWebRTC

class ViewController: UIViewController {
    @IBAction func startChat(_ sender: Any) {
        self.present(ChatViewController(), animated: true)
    }
}
5. Implement Push Notifications (Optional)
Push notifications can be enabled to notify your users when they receive new messages in the Crisp chat, even when your app is in the background or closed.
Prerequisites
- Create an APNs-enabled private key in your Apple Developer account. Create a new key and Select
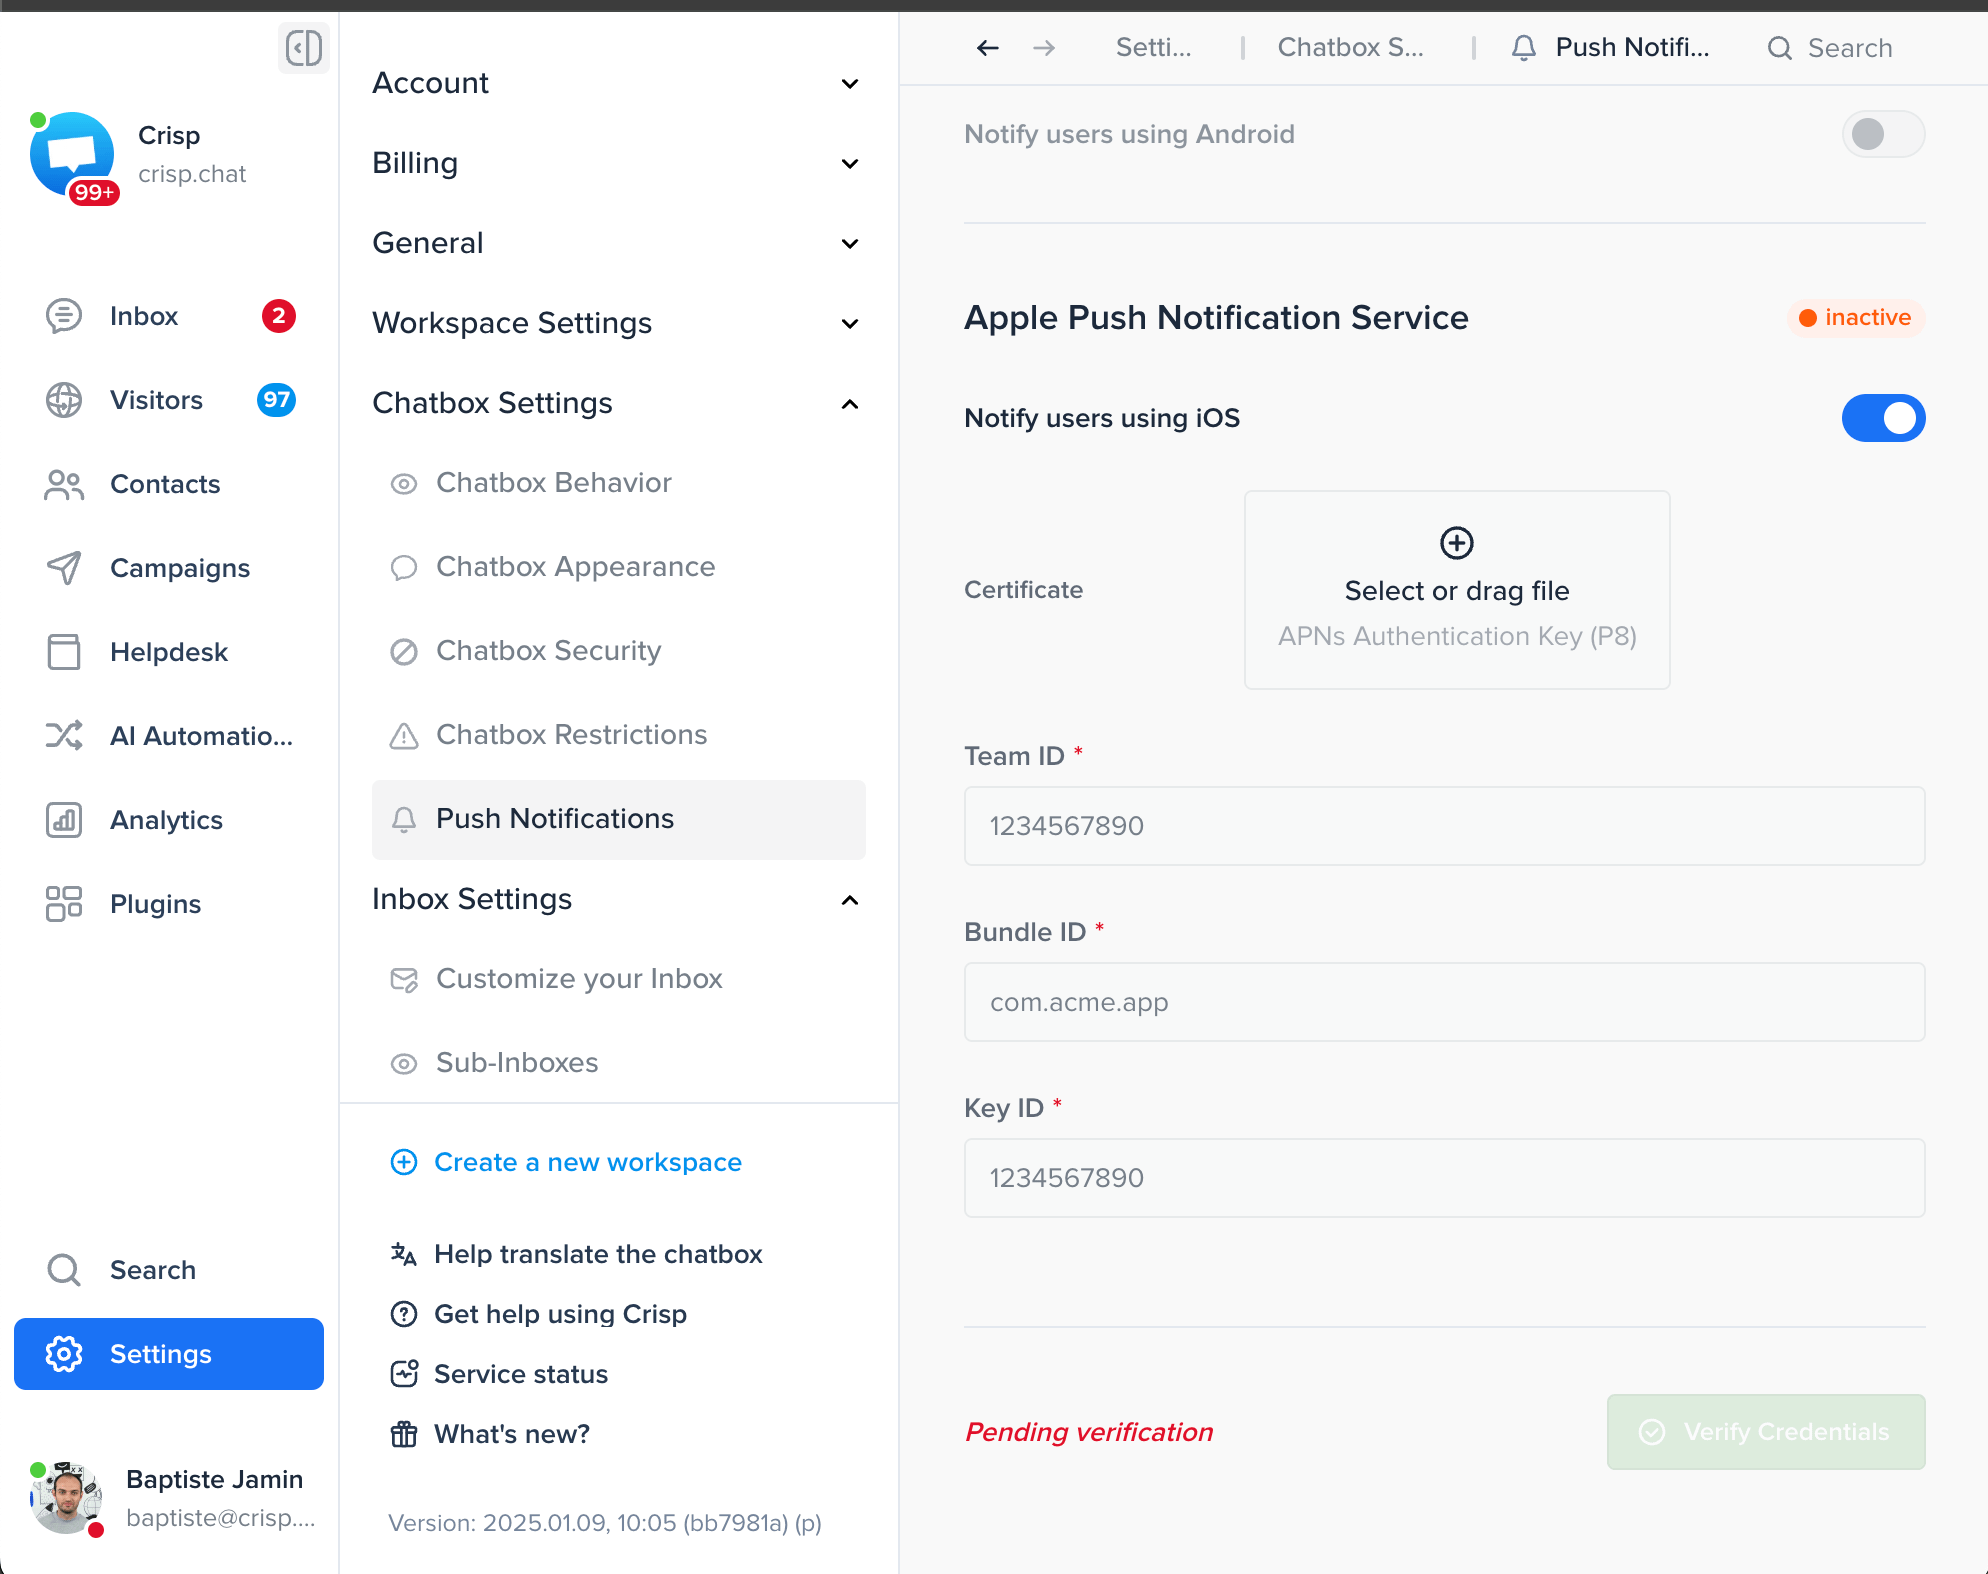
Apple Push Notifications service (APNs). - Upload your key and configure push notifications in the Crisp web app:
- Go to Settings > Chatbox Settings > Push Notifications
- Provide your P8 Certificate, Team ID, Bundle ID and Key ID
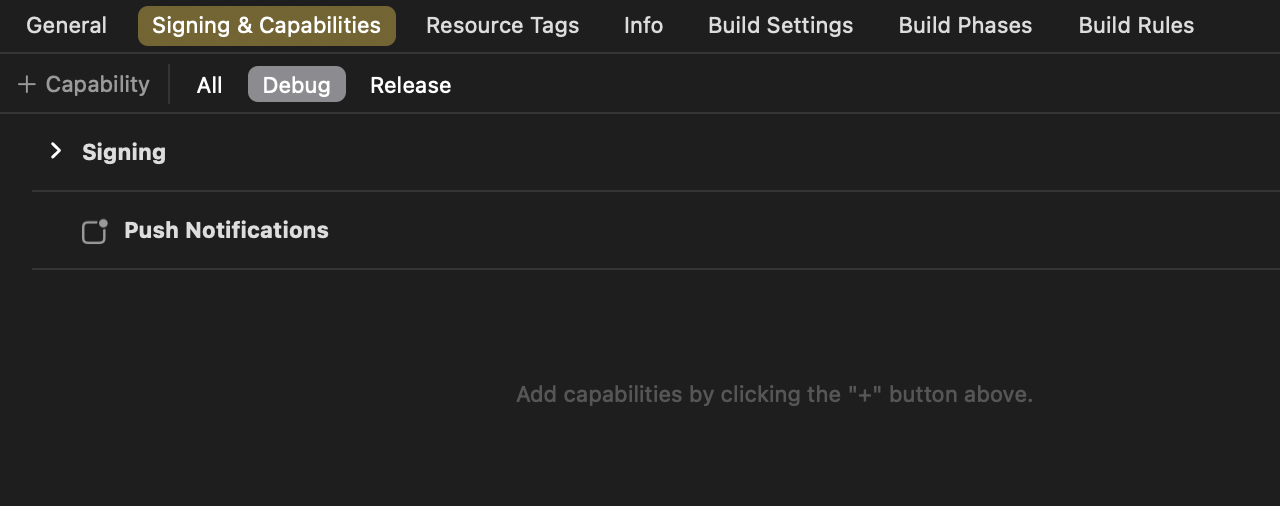
5.1 Enable Push Notifications Capability
Enable Push Notifications capability in your Xcode project:
- Open your project in Xcode
- Select your target
- Go to the "Signing & Capabilities" tab
- Click the "+" button and add "Push Notifications"
5.2 Implementation
Register for Remote Notifications
First, register for remote notifications in your app delegate:
func application(_ application: UIApplication,
                didFinishLaunchingWithOptions launchOptions: [UIApplication.LaunchOptionsKey: Any]?) -> Bool {
    // Register for remote notifications
    DispatchQueue.main.async {
        UIApplication.shared.registerForRemoteNotifications()
    }
    return true
}
Setting the Device Token
When your app successfully registers for remote notifications, pass the device token to Crisp SDK:
import Crisp

func application(_ application: UIApplication,
                 didRegisterForRemoteNotificationsWithDeviceToken deviceToken: Data) {
    CrispSDK.setDeviceToken(deviceToken)
}Identifying Crisp Notifications
To determine if a received notification is from Crisp, use the isCrispPushNotification(_:) method:
func userNotificationCenter(_ center: UNUserNotificationCenter,
                          willPresent notification: UNNotification,
                          withCompletionHandler completionHandler: @escaping (UNNotificationPresentationOptions) -> Void) {
    if CrispSDK.isCrispPushNotification(notification) {
        // Handle Crisp notification
        CrispSDK.handlePushNotification(notification)
        completionHandler([.banner, .sound])
    } else {
        // Handle other notifications
        completionHandler([])
    }
}
Handling Crisp Notifications
When a Crisp notification is received, use the handlePushNotification(_:) method to process it:
func userNotificationCenter(_ center: UNUserNotificationCenter,
                          didReceive response: UNNotificationResponse,
                          withCompletionHandler completionHandler: @escaping () -> Void) {
    let notification = response.notification
    if CrispSDK.isCrispPushNotification(notification) {
        CrispSDK.handlePushNotification(notification)
    } else {
        // Handle other notifications
    }
    completionHandler()
}
Availables APIs
Swift APIs
The extensive Swift documentation is available here.
CrispSDK.configure(websiteID: "YOUR_WEBSITE_ID")— Configures the SDK with a website_idCrispSDK.setTokenID(tokenID: "A_CUSTOM_ID")— Assigns session with a token_idCrispSDK.user.email = "john.doe@gmail.com"— Sets user emailCrispSDK.user.signature = "SHA256_SIGNATURE"— Sets the email signature to verify the user identity (as part of the Identity Verification feature; must be a validHMAC-SHA256hex digest, set together with — or after —email)CrispSDK.user.nickname = "John Name"— Sets user nameCrispSDK.user.phone = "003370123456789"— Sets user phoneCrispSDK.user.avatar = URL(string: "https://pbs.twimg.com/profile_images/782474226020200448/zDo-gAo0_400x400.jpg")— Sets user avatarCrispSDK.user.company = Company(name: "Acme", url: nil, companyDescription: nil, employment: nil, geolocation: nil)— Sets user compayCrispSDK.session.setString("custom_value", forKey: "custom_key")— Sets session data stringCrispSDK.session.setInt(42, forKey: "custom_key")— Sets session data intCrispSDK.session.pushEvents([SessionEvent(name: "Signup", color: SessionEventColor.blue)])— Pushes an array of events (separated by a comma)CrispSDK.session.segment = "app"— Sets session segmentCrispSDK.session.reset()— Resets the sessionCrispSDK.searchHelpdesk()— Opens the helpdeskCrispSDK.openHelpdeskArticle(locale: "en", slug: "1h6ppad", title: nil, category: nil)— Opens an helpdesk article
Examples of Crisp implementation on iOS apps
If you are looking to find examples of real-world exemples from our customers, we have you covered. Below you will find a selection of hand-picked iOS apps showcasing how our chatbox feels and looks on your Apple device.
- RunMotion Coach — is a running planner application to help meet your objectives
- Jomo — helps you manage your screen time and stay focused throughout your day
- Emma-app — serves as a friendly budget management and financial companion
- Savvy Navvy — acts as your own digital coral reef to prepare against the tides