Plugins let any developer extend the capabilities of Crisp apps by building new features, or connecting Crisp with external platforms. Plugins are also referred-to as Integrations.
This guide introduces you to Crisp plugins, and how to create one from scratch.
Prelude
Plugins can be built in your favorite programming language, and hosted on your own servers. You can build multiple plugins, for different purposes, and host them on the same server.
To interact with Crisp, a plugin would use the REST API and the RTM API. Sometimes it would only require the REST API, sometimes it would use the REST API and RTM API in pair. This depends on whether your plugin also needs to receive events from Crisp.
To make the process of implementing plugins more convenient, we provide a set of API Libraries for the most common programming languages. Those libraries offer a simple programmatic interface over the REST API. In some cases, they also expose a way to connect to the RTM API and receive real-time events.
In order to manage your plugins and obtain access to the Crisp Platform, you would use Crisp Marketplace. The Marketplace is the central point where all things related to plugins happen: create your plugins, upload a logo, generate your access tokens, request more permissions, etc.
Upon starting up, a plugin would load up the list of Crisp websites that are subscribed to it (ie. that installed the integration). The settings for each website would also be loaded at the same time, providing a way to retrieve per-user configuration. It would then maintain the list of websites that installed the plugin, taking care of removing from the list the websites that would uninstall the plugin, at any point.
Overview Schematic
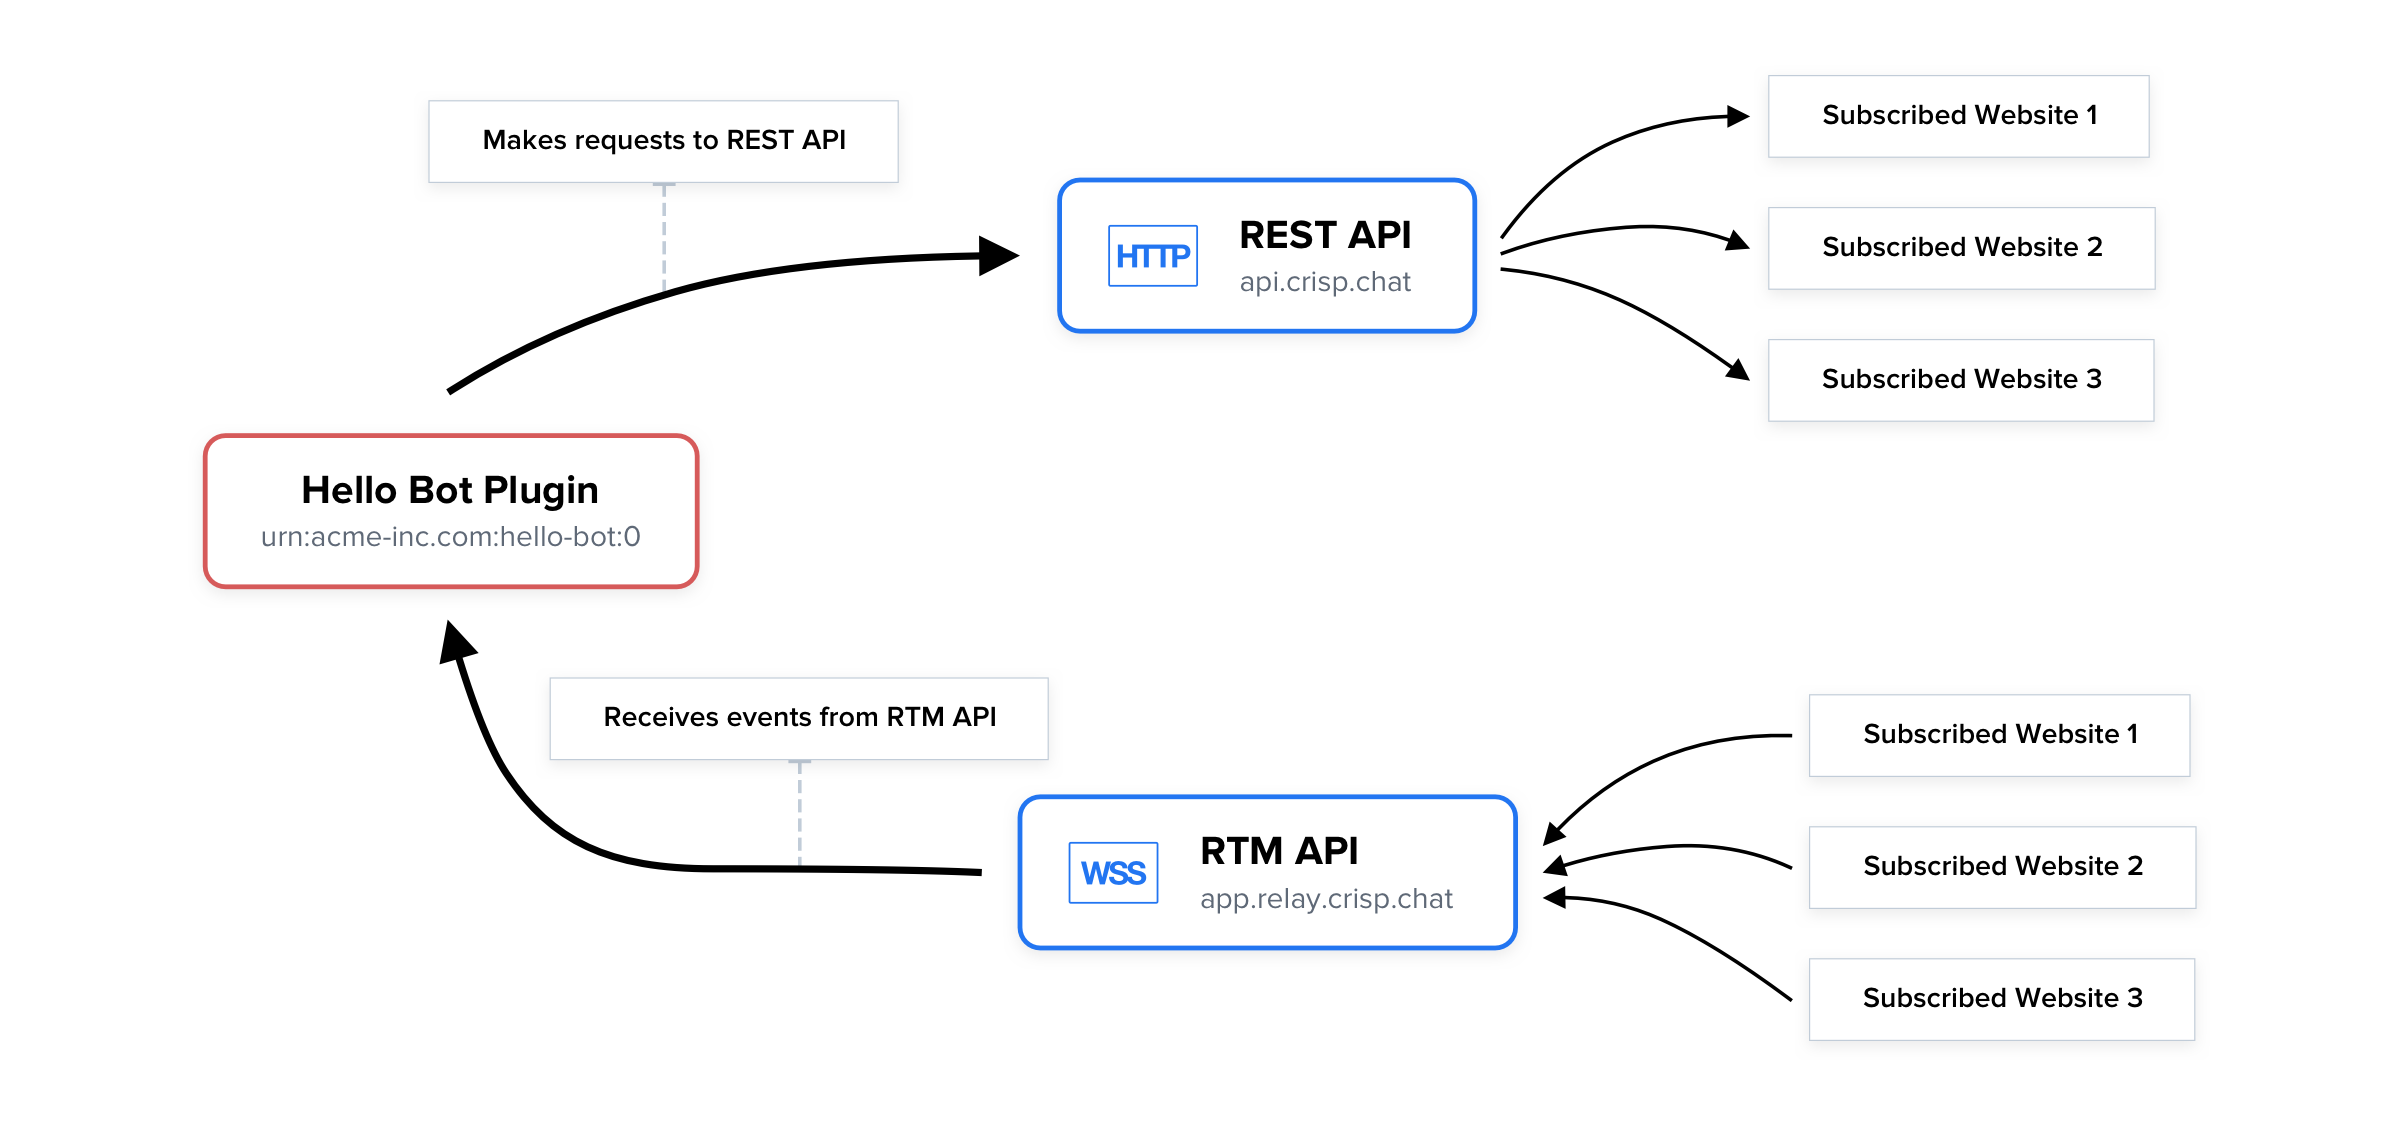
👉 Plugins interact with the REST API and RTM API, to make requests and receive events on behalf of all Crisp websites that installed the integration. A given plugin only has access to Crisp websites that are subscribed to it.
The Recipe of a Plugin
When building a plugin, you will need to mix up a few ingredients (so to speak), as follows:
- You need to be able to make HTTP requests to the REST API (eg. to send messages);
- Optionally, you may subscribe to real-time events on the RTM API (eg. to receive messages);
- You need to have an account on the Crisp Marketplace (this is different from your main Crisp account);
- You need to have a plugin created on the Marketplace;
- Your plugin should have an authentication token active (with its scopes and limits);
- The plugin should be hosted on your own servers, and run from there (we do not offer plugin hosting);
- Your plugin can be built in any programming language (we provide convenience libraries);
Create Your First Plugin
Before you can start building your first plugin, you need to login to or create a Marketplace account.
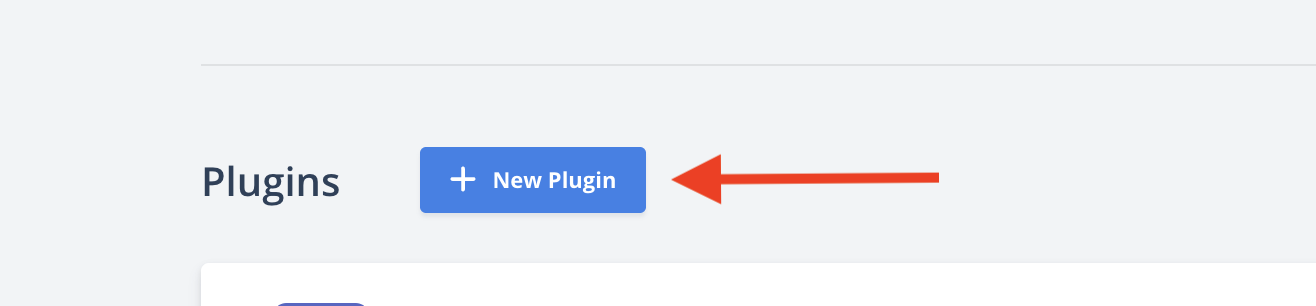
Once this is done, click on the New Plugin button, and provide your plugin details: a name, and a description. Also, pick a visibility for your plugin, which can be either Private or Public.
Private plugins are typically used for private integrations that would only involve your own Crisp website, while Public plugins can be published on our Integrations page, letting any Crisp user install your plugin.
Now that the plugin is created, you can start building! Head to the Tokens section, and copy your Development token keypair.

An in-depth guide on building your first plugin, with examples, is available. Head to the Examples guide to continue.
Submit Your First Plugin
Once your plugin is ready and tested on your local computer, using a Development token, you can start the submission process on the Marketplace to publish your plugin!
Before you submit your plugin
First off, please make sure that all your plugin details are filled in the Listing section of your plugin in the Marketplace.
Please check that the following details are filled (this is required):
- Your plugin has a logo set
- Your plugin name lets users properly identify your plugin
- The category of your plugin is set
- The summary and description texts are provided
- You provided a documentation URL for the users of your plugin
- Your website URL is set
- A support URL or email address is set (start with
mailto:if this is an email) - Your terms of service and privacy policy URLs are provided (could be the same URL)
How can I obtain my Production token?
To obtain your Production token, please follow the REST API Authentication guide, which walks you through defining your token scopes, and requesting your token.


Why do I need to submit my plugin for review?
As a platform exposing Crisp website data to all installed integrations, we need to make sure that every plugin makes a fair use of the data they have access to.
Therefore, each initial plugin submission or update needs to be validated by our Marketplace validation team.
How long will the review process take?
Our marketplace validation team reviews submissions several times per day during week days. We automatically notify you by email once your submission is either accepted, or rejected.
While your submission is pending, you can still continue using development tokens at your convenience.
Once your submission is accepted, your Production token will be available to you for immediate use. Go back to your Marketplace dashboard, and copy & paste your new Production token to your plugin configuration.
Common Questions
What is the Marketplace?
The Marketplace is the dashboard where all things related to plugins happen:
- Create new plugins
- Manage authentication tokens and their scopes
- Request for quota increases
- Upload a logo, write your plugin description, describe features, add screenshots and support links
- Setup various callback links
- Setup the settings schema, setup the widget
- Manage your developer identity, request a Business Name
What is the REST API and RTM API?
When developing plugins, you will always be referred to two APIs: the REST API and the RTM API.
Here's a short description of each API and their purpose:
- REST API: this is Crisp HTTP API, which you will use to read and write data on Crisp websites behalf, eg. send a message or acquire previous messages.
- RTM API: this is Crisp WebSocket API, which lets you receive events as they happen on Crisp websites, eg. receive messages that visitors send.
How can I make requests to the REST API?
👉 To start using the REST API, please read our REST API Quickstart guide, which will get you running in a few minutes.
How can I receive events from the RTM API?
👉 To start using the RTM API, please read our RTM API Quickstart guide, which will get you running in a few minutes.
What is a Development token vs. a Production token?
Each plugin created on the Marketplace has access to two tokens: a Development token, and a Production one.
Development token
The Development token allows you to develop and test your plugin, without going through the process of submitting your plugin for review and activation:
- All scopes and permissions are enabled by default
- It can make REST API requests to your Trusted Workspace only (you cannot access a second workspace)
- It has a rate limit that is very low (unfit for long-term use)
Production token
On the other hand, the Production token must be used when running your integration "in the real world":
- It allows you to specify which scopes and permissions that your plugin needs
- It can make REST API requests to any Crisp website that installed the plugin
- It has a higher default rate limit (and you can ask for a custom rate limit)
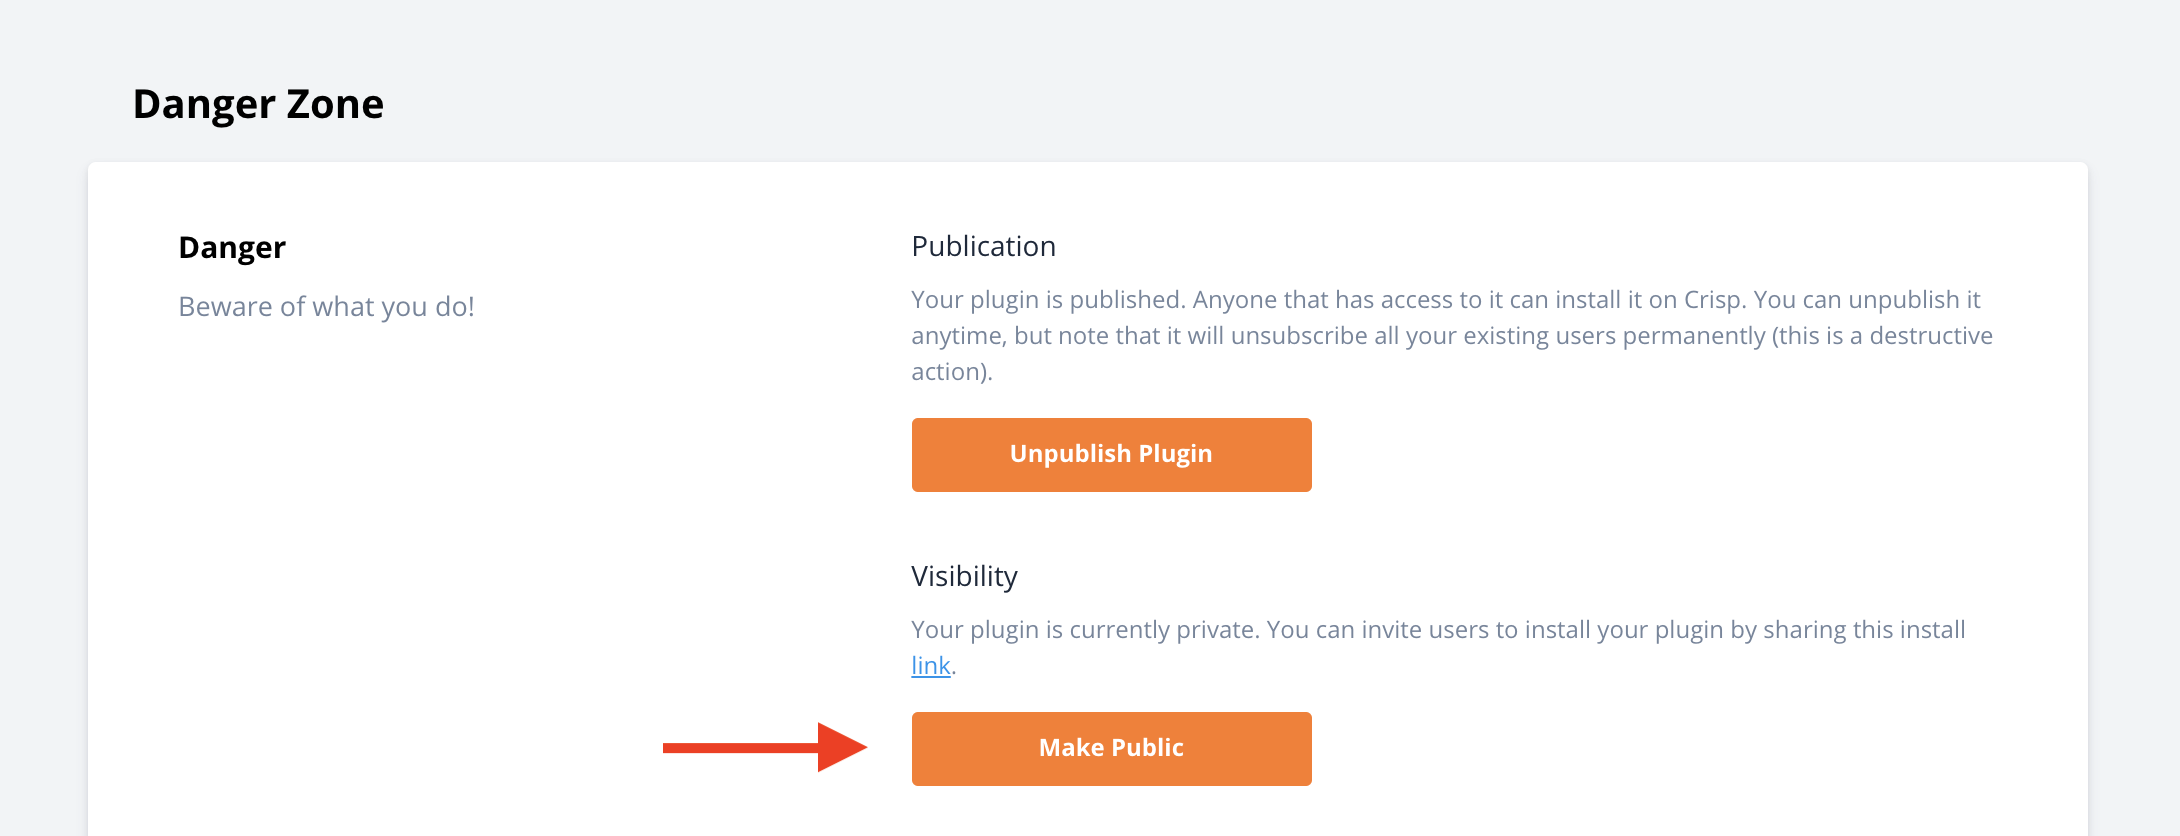
What are Private vs. Public plugins?
When creating a plugin, you can choose its visibility: either Private or Public.
The visibility is a privacy setting allowing you to control who can see and install your plugin, as such:
- Private: private plugins can only be installed through a private installation link. They don't appear on our Integrations page, nor on the "All Plugins" page in the Crisp app.
- Public: anyone can see and install public plugins. They are visible on our Integrations page and on the "All Plugins" page in the Crisp Dashboard as well.